


Arduino直流电机驱动-L298P-Twin 2x2A电机驱动Arduino扩展板
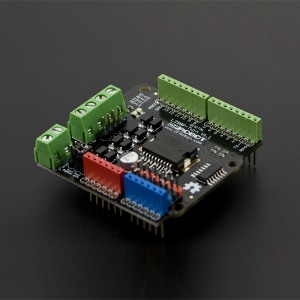
外观
简介
- 这是一款基于L298芯片的Arduino平台双路电机驱动扩展板,可以直接插入Arudino控制板使用。
- 控制端口为4个,减少了对Arduino数字端口的开销,而且控制程序也更为简单。
- 扩展板采用跳线选择Arduino VIN供电还是外接电源供电。
产品参数
- 驱动工作电压:4.8 ~ 35V
- 最大输出电流:单路2A
- 最大耗散功率:25W(T=75℃)
- 驱动形式:双路H桥驱动
- 驱动电源接口:一路外部电源端子 / Arduino-VIN
- 驱动输出接口:两路电机接线端子 / 排针
- Arduino控制端口:数字口10,11,12,13
- 工作温度:-25℃ ~ 130℃
- 模块尺寸:56x57mm
应用
- 电动小车
引脚说明

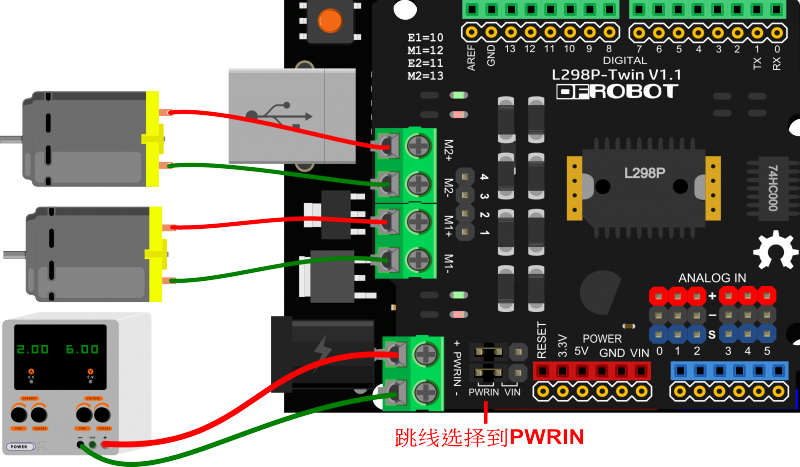
- 驱动电源选择跳线:用于选择驱动电源,一路是外部驱动电源(PWMIN),一路是来自于母板(比如使用Arduino UNO)的VIN;根据驱动电机的电压和电流要求选择使用。默认是选择VIN,即图示的方式。
注意:这里的两组跳线是并联的,两个跳线帽需要同步使用以满足大电流通过的要求。
外部电源端子(PWMIN):用于连接外部电源给驱动供电。
驱动输出接口:用于连接2路直流电机;提供接线端子和排针两种连接方式,接线端子(M1- M1+ M2- M2+)和排针(1 2 3 4)相对应,根据实际情况选择使用。
模拟3PIN接口:用于连接3PIN接口的传感器、执行器等模块。 注意:这里线序是(+ - S)。
Mn指示灯:Mn+为正时红色灯亮,反之绿色灯亮,用于调试。注意:电机工作时有反电动势,因此存在两个灯同时亮的情况。
控制端口:用于控制电机的转速和方向。在模块上印刷有“控制表”方便查看端口功能,其中En用于控制电机转速(PWM调速),Mn用于控制电机旋转方向。控制端口的真值表为:
| En | Mn | 状态 |
| L | X | Mn禁止 |
| H | L | Mn正转(Mn+为正) |
| H | H | Mn反转(Mn+为负) |
注1:n=1,2。 注2:H表示高电平1;L表示低电平0;X表示任意电平。
使用教程
控制直流电机
目标:对直流电机进行调速和方向控制
步骤一:硬件清单
- UNO 1
- 直流电机 2
- 稳压电源 1
- 本模块 1
- 导线
步骤二:软件清单
- Arduino IDE
步骤三:连线图
步骤四:操作步骤
- 打开Arduino IDE
- 将下面的代码上传到UNO
- 库安装
/**set control port**/
 const int E1Pin = 10;
 const int M1Pin = 12;
 const int E2Pin = 11;
 const int M2Pin = 13;

 /**inner definition**/
 typedef struct
 {
    byte enPin;
    byte directionPin;
 }MotorContrl;

 const int M1 = 0;
 const int M2 = 1;
 const int MotorNum = 2;

 const MotorContrl MotorPin[] ={ {E1Pin,M1Pin}, {E2Pin,M2Pin} } ;

 const int Forward = LOW;
 const int Backward = HIGH;

 /**program**/
 void setup()
 {
   initMotor();
 }
 void loop()
 {
   int value;
   /**test M1 **/
   setMotorDirection( M1, Forward );
   setMotorSpeed( M1, 100 );
   delay(1000);
   setMotorSpeed( M1, 0 );
   delay(100);

   setMotorDirection( M1, Backward );
   setMotorSpeed( M1, 50 );
   delay(1000);
   setMotorSpeed( M1, 0 );
   delay(100);

   /**test M2**/
   setMotorDirection( M2, Backward );
   for(value = 0 ; value <= 100; value+=5)
   {
     setMotorSpeed( M2, value );
     delay(100);
   }
   setMotorSpeed( M2, 0 );
   setMotorDirection( M2, Forward );
   for(value = 0 ; value <= 100; value+=5)
   {
     setMotorSpeed( M2, value );
     delay(100);
   }
   setMotorSpeed( M2, 0 );
 }

 /**functions**/
 void initMotor( )
 {
    int i;
    for ( i = 0; i < MotorNum; i++ )
    {
      digitalWrite(MotorPin[i].enPin, LOW);

      pinMode(MotorPin[i].enPin, OUTPUT);
      pinMode(MotorPin[i].directionPin, OUTPUT);
    }
 }

 /**  motorNumber: M1, M2
        direction:          Forward, Backward **/
 void setMotorDirection( int motorNumber, int direction )
 {
     digitalWrite( MotorPin[motorNumber].directionPin, direction);
 }

 /** speed:  0-100   * */
 inline void setMotorSpeed( int motorNumber, int speed )
 {
     analogWrite(MotorPin[motorNumber].enPin, 255.0 * (speed/100.0) );   //PWM
 }
步骤五:实验结果
M1将全速正转,然后半速反转; M2速度由大到小,先反转,然后正转。
注意:电机的旋转方向是相对的,其转速大小也是相对的。
本文整理于 DFRobot wiki
获取最新文章: 扫一扫右上角的二维码加入“创客智造”公众号