ROS2与MoveIt2入门教程-机器人模型和机器人状态
说明:
- 介绍MoveItCpp
概述:
- 在本节教程中,将会引导您了解MoveIt2中使用运动学的C++ API。

RobotModel和RobotState类
RobotModel和RobotState类是MoveIt2的核心类,可以让用户访问机器人运动学。
RobotModel类包含所有链接和关节之间的关系,包括从URDF加载的关节限制等属性。RobotModel类也会将机器人的链接和关节划分成SRDF中定义的多个规划组。可以在此处找到有关URDF和SRDF的单独教程:URDF和SRDF教程。
RobotState类包含有关机器人在某个时间点的信息,存储关节位置向量以及可选的速度和加速度。该信息可用于获取有关机器人的运动学信息,该信息取决于机器人当前状态,例如末端执行器的雅可比矩阵。
RobotState类也包含用于根据末端执行器位置(笛卡尔位姿)设置手臂位置和计算笛卡尔轨迹的辅助函数。
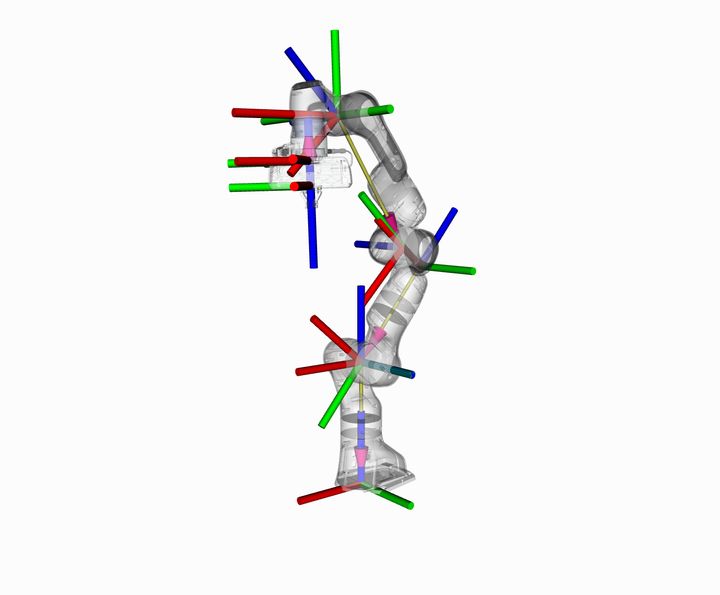
在本教程示例中,将会逐步引导用户了解这些类在Panda机器人上使用的过程。
运行代码
本教程中的所有代码都可以从作为MoveIt2安装组成部分之一的 moveit2_tutorials软件包中编译和运行。
- 使用ros2 launch命令直接从moveit2_tutorials软件包中的启动文件来运行该代码:
ros2 launch moveit2_tutorials robot_model_and_robot_state_tutorial.launch.py
预期输出
- 预期输出会采用以下形式。由于这里使用的是随机关节值,因此数字会不相同:
... [robot_model_and_state_tutorial]: Model frame: world
... [robot_model_and_state_tutorial]: Joint panda_joint1: 0.000000
... [robot_model_and_state_tutorial]: Joint panda_joint2: 0.000000
... [robot_model_and_state_tutorial]: Joint panda_joint3: 0.000000
... [robot_model_and_state_tutorial]: Joint panda_joint4: 0.000000
... [robot_model_and_state_tutorial]: Joint panda_joint5: 0.000000
... [robot_model_and_state_tutorial]: Joint panda_joint6: 0.000000
... [robot_model_and_state_tutorial]: Joint panda_joint7: 0.000000
... [robot_model_and_state_tutorial]: Current state is not valid
... [robot_model_and_state_tutorial]: Current state is valid
... [robot_model_and_state_tutorial]: Translation:
-0.368232
0.645742
0.752193

... [robot_model_and_state_tutorial]: Rotation:
 0.362374 -0.925408  -0.11093
 0.911735  0.327259  0.248275
 -0.193453 -0.191108  0.962317

... [robot_model_and_state_tutorial]: Joint panda_joint1: 2.263889
... [robot_model_and_state_tutorial]: Joint panda_joint2: 1.004608
... [robot_model_and_state_tutorial]: Joint panda_joint3: -1.125652
... [robot_model_and_state_tutorial]: Joint panda_joint4: -0.278822
... [robot_model_and_state_tutorial]: Joint panda_joint5: -2.150242
... [robot_model_and_state_tutorial]: Joint panda_joint6: 2.274891
... [robot_model_and_state_tutorial]: Joint panda_joint7: -0.774846
... [robot_model_and_state_tutorial]: Jacobian:
  -0.645742  -0.26783  -0.0742358  -0.315413  0.0224927  -0.031807  -2.77556e-17
  -0.368232  0.322474  0.0285092  -0.364197  0.00993438  0.072356  2.77556e-17
    0  -0.732023  -0.109128  0.218716  2.9777e-05  -0.11378  -1.04083e-17
    0  -0.769274  -0.539217  0.640569  -0.36792  -0.91475  -0.11093
    0  -0.638919  0.64923  -0.0973283  0.831769  -0.40402  0.248275
    1  4.89664e-12  0.536419  0.761708  0.415688  -0.00121099  0.962317
*注:如果您的输出具有不同的ROS控制台格式,请不必担心。
完整代码
完整代码可以在此处的MoveIt GitHub项目中看到。
- 启动
使用RobotModel类进行启动设置非常简单。通常,您会发现大多数更高级的组件都会返回一个指向RobotModel类的共享指针。如果可能,您应该始终使用该指针。在本示例中,将会使用这样一个共享指针来启动,而且只会讨论基本的API。可以查看这些类的实际代码API,以获取有关如何使用这些类提供的更多功能的更详细信息。
- 我们首先会实例化一个RobotModelLoader对象,该对象会在ROS 参数服务器上查找机器人描述并构建一个RobotModel供我们使用。
robot_model_loader::RobotModelLoader robot_model_loader(node);
const moveit::core::RobotModelPtr& kinematic_model = robot_model_loader.getModel();
RCLCPP_INFO(LOGGER, "Model frame: %s", kinematic_model->getModelFrame().c_str());
- 使用RobotModel,我们可以构建一个RobotState来维护机器人的配置。我们将该状态中的所有关节均设置为默认值。然后可以获得一个JointModelGroup,它代表一个具体规划组的机器人模型,例如Panda机器人的“panda_arm”规划组。
moveit::core::RobotStatePtr kinematic_state(new moveit::core::RobotState(kinematic_model));
kinematic_state->setToDefaultValues();
const moveit::core::JointModelGroup* joint_model_group = kinematic_model->getJointModelGroup("panda_arm");

const std::vector<std::string>& joint_names = joint_model_group->getVariableNames();
- 获取关节值。我们可以检索存储在Panda手臂规划组状态中的当前关节值集合:
std::vector<double> joint_values;
kinematic_state->copyJointGroupPositions(joint_model_group, joint_values);
for (std::size_t i = 0; i < joint_names.size(); ++i)
{
  RCLCPP_INFO(LOGGER, "Joint %s: %f", joint_names[i].c_str(), joint_values[i]);
}
- 关节限制。函数setJointGroupPositions()本身并不会强制执行关节限制,但调用enforceBounds()函数就会执行关节限制。
/* Set one joint in the Panda arm outside its joint limit */
joint_values[0] = 5.57;
kinematic_state->setJointGroupPositions(joint_model_group, joint_values);

/* Check whether any joint is outside its joint limits */
RCLCPP_INFO_STREAM(LOGGER, "Current state is " << (kinematic_state->satisfiesBounds() ? "valid" : "not valid"));

/* Enforce the joint limits for this state and check again*/
kinematic_state->enforceBounds();
RCLCPP_INFO_STREAM(LOGGER, "Current state is " << (kinematic_state->satisfiesBounds() ? "valid" : "not valid"));
- 正运动学
现在,我们可以计算一组随机关节值的正运动学(FK)。请注意,这里我们想找到机器人“panda_arm”规划组中最远端链接“panda_link8”的位姿。


kinematic_state->setToRandomPositions(joint_model_group);
const Eigen::Isometry3d& end_effector_state = kinematic_state->getGlobalLinkTransform("panda_link8");

/* Print end-effector pose. Remember that this is in the model frame */
RCLCPP_INFO_STREAM(LOGGER, "Translation: \n" << end_effector_state.translation() << "\n");
RCLCPP_INFO_STREAM(LOGGER, "Rotation: \n" << end_effector_state.rotation() << "\n");
逆运动学
我们现在可以为Panda机器人求解逆运动学(IK)。要求解IK,我们需要以下信息:
端执行器的期望位姿(默认情况下是“panda_arm”链中的最后一个链接):即在上一个步骤中计算的end_effector_state。
超时时间:0.1s
double timeout = 0.1;
bool found_ik = kinematic_state->setFromIK(joint_model_group, end_effector_state, timeout);
- 现在,我们可以打印输出该IK解算结果(如果求解到了的话):
if (found_ik)
{
  kinematic_state->copyJointGroupPositions(joint_model_group, joint_values);
  for (std::size_t i = 0; i < joint_names.size(); ++i)
  {
    RCLCPP_INFO(LOGGER, "Joint %s: %f", joint_names[i].c_str(), joint_values[i]);
  }
}
else
{
 RCLCPP_INFO(LOGGER, "Did not find IK solution");
}
- 获取雅可比矩阵。我们还可以从RobotState中获取雅可比矩阵:
Eigen::Vector3d reference_point_position(0.0, 0.0, 0.0);
Eigen::MatrixXd jacobian;
kinematic_state->getJacobian(joint_model_group,
                         kinematic_state->getLinkModel(joint_model_group->getLinkModelNames().back()),
                         reference_point_position, jacobian);
RCLCPP_INFO_STREAM(LOGGER, "Jacobian: \n" << jacobian << "\n");
- 启动文件
要运行该代码,需要一个启动文件,该启动文件要完成以下两件事:
将Panda机器人的URDF和SRDF加载到参数服务器上;
将MoveIt设置助手生成的kinematics_solver配置推送到ROS 参数服务器上实例化了本教程中各个类的节点命名空间中。
import os
import yaml
from launch import LaunchDescription
from launch_ros.actions import Node
from launch.actions import ExecuteProcess
from ament_index_python.packages import get_package_share_directory
import xacro


def load_file(package_name, file_path):
    package_path = get_package_share_directory(package_name)
    absolute_file_path = os.path.join(package_path, file_path)

    try:
        with open(absolute_file_path, "r") as file:
            return file.read()
    except EnvironmentError:  # parent of IOError, OSError *and* WindowsError where available
        return None


def load_yaml(package_name, file_path):
    package_path = get_package_share_directory(package_name)
    absolute_file_path = os.path.join(package_path, file_path)

    try:
        with open(absolute_file_path, "r") as file:
            return yaml.safe_load(file)
    except EnvironmentError:  # parent of IOError, OSError *and* WindowsError where available
        return None


def generate_launch_description():
    # planning_context
    robot_description_config = load_file(
        "moveit_resources_panda_description", "urdf/panda.urdf"
    )

    robot_description_semantic_config = load_file(
        "moveit_resources_panda_moveit_config", "config/panda.srdf"
    )

    kinematics_yaml = load_yaml(
        "moveit_resources_panda_moveit_config", "config/kinematics.yaml"
    )

    tutorial_node = Node(
        package="moveit2_tutorials",
        executable="robot_model_and_robot_state_tutorial",
        output="screen",
        parameters=[
            {"robot_description": robot_description_config},
            {"robot_description_semantic": robot_description_semantic_config},
            kinematics_yaml,
    ],
)

return LaunchDescription([tutorial_node])
- 英语原文地址:https://moveit2_tutorials.picknik.ai/doc/robot_model_and_robot_state/robot_model_and_robot_state_tutorial.html
获取最新文章: 扫一扫右上角的二维码加入“创客智造”公众号


