


ROS与web入门教程-整合ros2djs
纠错,疑问,交流: 请进入讨论区或 请点击进入页面,扫码加入微信群或Q群进行交流
获取最新文章: 扫一扫加入“创客智造”公众号
ROS与web入门教程-整合ros2djs
说明:
- 介绍如何整合ros2djs
步骤:
- 下载ros2djs
cd ~/web/ros/
git clone https://github.com/RobotWebTools/ros2djs- 下载地图
cd ~/web/ros/
git clone https://github.com/GT-RAIL/rail_maps- 修改map.html
cd /home/ubuntu/web/ros/ros2djs/examples
vim map.html- 修改ip为:
var ros = new ROSLIB.Ros({
    url: 'ws://192.168.0.139:9090'
});
测试:
- 启动rosbridge_server
roslaunch rosbridge_server rosbridge_websocket.launch- 启动map_server
rosrun map_server map_server /home/ubuntu/web/ros/rail_maps/maps/ilab.pgm 0.05-
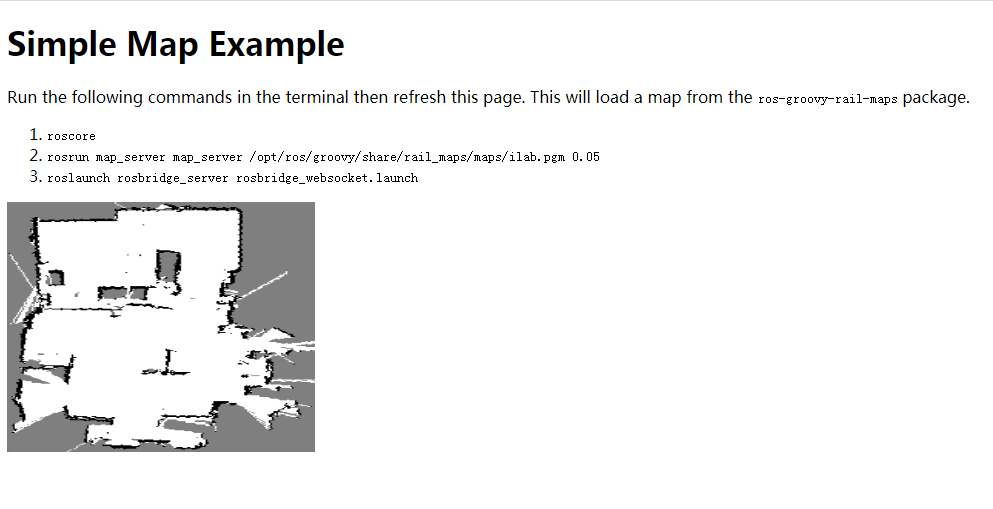
打开页面http://192.168.0.139:81/ros/ros2djs/examples/map.html
-
效果如下:
整合到cakephp
- 在cakephp下增加ros.php
cd /home/ubuntu/web/cms/templates/Pages
cp turtlesim.php map2d.php- 复制ros2djs到cakephp下目录
cp /home/ubuntu/web/ros/ros2djs/build/ros2d.js /home/ubuntu/web/cms/webroot/js/- 修改内容为:
<?php
/**
 * CakePHP(tm) : Rapid Development Framework (https://cakephp.org)
 * Copyright (c) Cake Software Foundation, Inc. (https://cakefoundation.org)
 *
 * Licensed under The MIT License
 * For full copyright and license information, please see the LICENSE.txt
 * Redistributions of files must retain the above copyright notice.
 *
 * @copyright Copyright (c) Cake Software Foundation, Inc. (https://cakefoundation.org)
 * @link      https://cakephp.org CakePHP(tm) Project
 * @since     0.10.0
 * @license   https://opensource.org/licenses/mit-license.php MIT License
 * @var \App\View\AppView $this
 */
use Cake\Cache\Cache;
use Cake\Core\Configure;
use Cake\Core\Plugin;
use Cake\Datasource\ConnectionManager;
use Cake\Error\Debugger;
use Cake\Http\Exception\NotFoundException;

$this->disableAutoLayout();

?>
<!DOCTYPE html>
<html>
<head>
    <meta charset="utf-8" />

    <?= $this->Html->script('https://static.robotwebtools.org/EaselJS/current/easeljs.js') ?>
    <?= $this->Html->script('https://static.robotwebtools.org/EventEmitter2/current/eventemitter2.min.js') ?>
    <?= $this->Html->script('https://static.robotwebtools.org/roslibjs/current/roslib.js') ?>

    <?= $this->Html->script('ros2d.js') ?>
    <?= $this->fetch('script') ?>

    <script>
        /**
         * Setup all visualization elements when the page is loaded.
         */
        function init() {
            // Connect to ROS.
            var ros = new ROSLIB.Ros({
                url: 'ws://192.168.0.139:9090'
            });

            // Create the main viewer.
            var viewer = new ROS2D.Viewer({
                divID: 'map',
                width: 308,
                height: 250
            });

            // Setup the map client.
            var gridClient = new ROS2D.OccupancyGridClient({
                ros: ros,
                rootObject: viewer.scene
            });
            // Scale the canvas to fit to the map
            gridClient.on('change', function() {
                viewer.scaleToDimensions(gridClient.currentGrid.width, gridClient.currentGrid.height);
                viewer.shift(gridClient.currentGrid.pose.position.x, gridClient.currentGrid.pose.position.y);
            });
        }
    </script>
</head>

<body onload="init()">
    <h1>Simple Map Example</h1>
    <p>
        Run the following commands in the terminal then refresh this page. This will load a map from the
        rail_maps package.
    </p>
    <ol>
        <li><tt>roslaunch rosbridge_server rosbridge_websocket.launch</tt></li>
        <li><tt>rosrun map_server map_server /home/ubuntu/web/ros/rail_maps/maps/ilab.pgm 0.05</tt></li>
    </ol>
    <div id="map"></div>
</body>

</html>
测试:
- 启动rosbridge_server
roslaunch rosbridge_server rosbridge_websocket.launch- 启动map_server
rosrun map_server map_server /home/ubuntu/web/ros/rail_maps/maps/ilab.pgm 0.05-
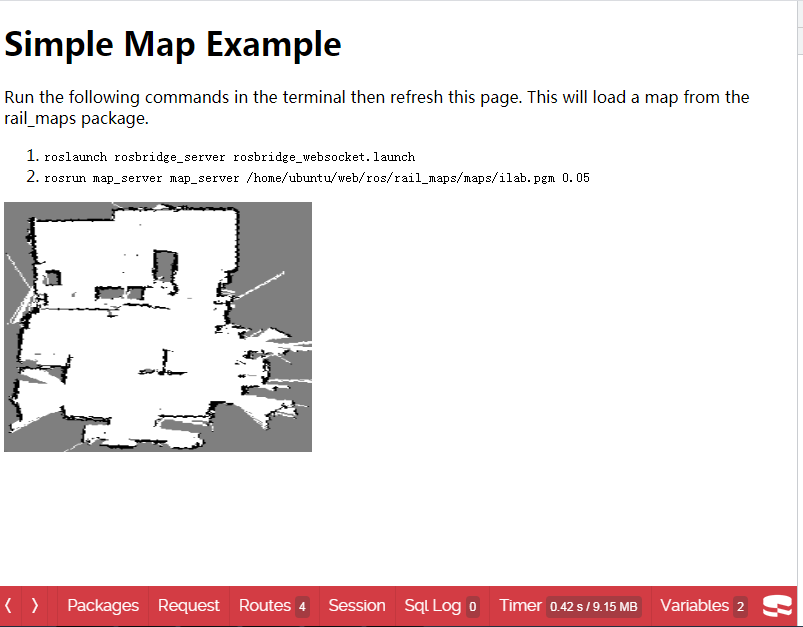
打开页面http://192.168.0.139/pages/map2d
-
效果如下:
纠错,疑问,交流: 请进入讨论区或 请点击进入页面,扫码加入微信群或Q群进行交流
获取最新文章: 扫一扫加入“创客智造”公众号