


Arduino内置教程-USB-键盘再编译
纠错,疑问,交流: 请进入讨论区或 请点击进入页面,扫码加入微信群或Q群进行交流
获取最新文章: 扫一扫加入“创客智造”公众号
Keyboard Reprogram
-
这个例子用键盘库赖打开一个新的Arduino IDE程序窗口,发送在闪烁例子打字的键盘命令,和重新编译开发板。运行完程序并且通过按键连接pin2到地后,开发板就会有一个新的程序,闪烁。
-
注意:当你用 Keyboard.print() 命令时,Arduino会接管你的电脑键盘!为了确保你没有失去对电脑的控制同时运行这个函数,确定在你调用 Keyboard.print()前,启动一个可靠的控制系统。这个程序被设计成只有在一个引脚下拉到地才能发送键盘命令。
硬件要求
- Arduino Leonardo, Micro, or Due 开发板
- 按键
- 连接线
- 面包板
软件要求
- Arduino IDE 运行着
电路
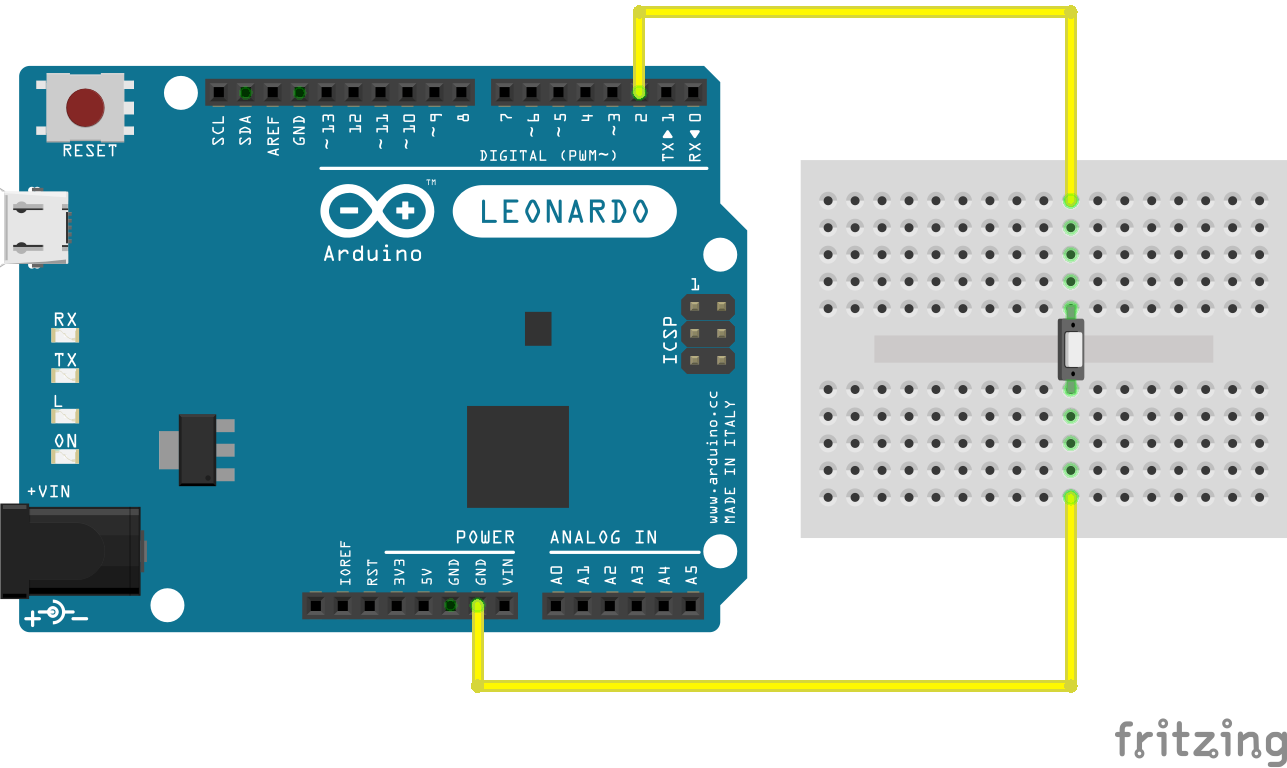 图由 Fritzing 软件绘制
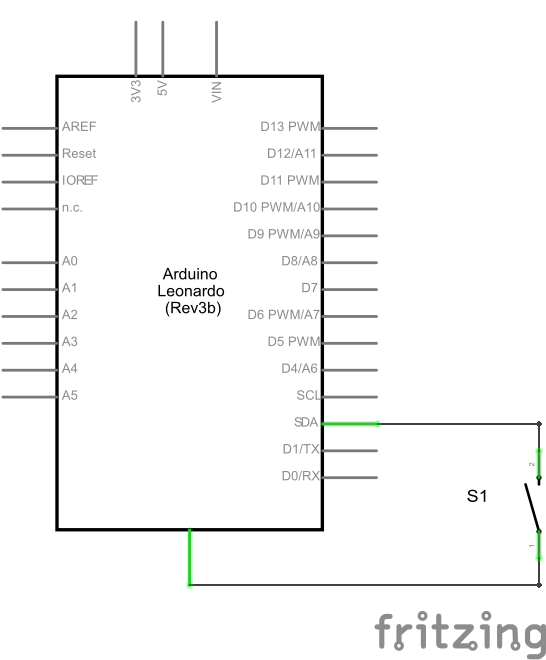
原理图
样例代码
- 连接你的开发板到USB接口上,然后按下按键连接引脚D2和地,初始化程序键盘按键模拟。记住在你按下按键之前,选上Arduino IDE软件。
/*
  Arduino Programs Blink

 This sketch demonstrates the Keyboard library.

 For Leonardo and Due boards only.

 When you connect pin 2 to ground, it creates a new
 window with a key combination (CTRL-N),
 then types in the Blink sketch, then auto-formats the text
 using another key combination (CTRL-T), then
 uploads the sketch to the currently selected Arduino using
 a final key combination (CTRL-U).

 Circuit:
 * Arduino Leonardo, Micro, Due, LilyPad USB, or Yún
 * wire to connect D2 to ground.

 created 5 Mar 2012
 modified 29 Mar 2012
 by Tom Igoe
 modified 3 May 2014
 by Scott Fitzgerald

 This example is in the public domain

 http://www.arduino.cc/en/Tutorial/KeyboardReprogram
 */

#include "Keyboard.h"

// use this option for OSX.
// Comment it out if using Windows or Linux:
char ctrlKey = KEY_LEFT_GUI;
// use this option for Windows and Linux.
// leave commented out if using OSX:
//  char ctrlKey = KEY_LEFT_CTRL;


void setup() {
  // make pin 2 an input and turn on the
  // pullup resistor so it goes high unless
  // connected to ground:
  pinMode(2, INPUT_PULLUP);
  // initialize control over the keyboard:
  Keyboard.begin();
}

void loop() {
  while (digitalRead(2) == HIGH) {
    // do nothing until pin 2 goes low
    delay(500);
  }
  delay(1000);
  // new document:
  Keyboard.press(ctrlKey);
  Keyboard.press('n');
  delay(100);
  Keyboard.releaseAll();
  // wait for new window to open:
  delay(1000);

  // versions of the Arduino IDE after 1.5 pre-populate
  // new sketches with setup() and loop() functions
  // let's clear the window before typing anything new
  //  select all
  Keyboard.press(ctrlKey);
  Keyboard.press('a');
  delay(500);
  Keyboard.releaseAll();
  // delete the selected text
  Keyboard.write(KEY_BACKSPACE);
  delay(500);

  // Type out "blink":
  Keyboard.println("void setup() {");
  Keyboard.println("pinMode(13, OUTPUT);");
  Keyboard.println("}");
  Keyboard.println();
  Keyboard.println("void loop() {");
  Keyboard.println("digitalWrite(13, HIGH);");
  Keyboard.print("delay(3000);");
  // 3000 ms is too long. Delete it:
  for (int keystrokes = 0; keystrokes < 6; keystrokes++) {
    delay(500);
    Keyboard.write(KEY_BACKSPACE);
  }
  // make it 1000 instead:
  Keyboard.println("1000);");
  Keyboard.println("digitalWrite(13, LOW);");
  Keyboard.println("delay(1000);");
  Keyboard.println("}");
  // tidy up:
  Keyboard.press(ctrlKey);
  Keyboard.press('t');
  delay(100);
  Keyboard.releaseAll();
  delay(3000);
  // upload code:
  Keyboard.press(ctrlKey);
  Keyboard.press('u');
  delay(100);
  Keyboard.releaseAll();

  // wait for the sweet oblivion of reprogramming:
  while (true);
}
[Get Code] 更多
- Keyboard.write()
- Keyboard.print()
- Keyboard.println()
- KeyboardLogout - 利用按键命令注销当前使用者
- KeyboardMessage - 当一个按键被按下,发送一个文本字符串。
- KeyboardReprogram - 在Arduino IDE上打开一个新窗口,用简单的跑马灯程序重新编译Leonardo
- KeyboardSerial - 从串口里读取一个字节,然后返回一个键值。
- KeyboardAndMouseControl - 在一个程序里示范鼠标和键盘命令
- ButtonMouseControl - 通过5个按键控制光标行动
- JoystickMouseControl - 当按键被按下时,通过一个操纵杆来控制电脑光标的行动
纠错,疑问,交流: 请进入讨论区或 请点击进入页面,扫码加入微信群或Q群进行交流
获取最新文章: 扫一扫加入“创客智造”公众号