


Pixhawk无人机教程-6.8 UBlox GPS
纠错,疑问,交流: 请进入讨论区或 请点击进入页面,扫码加入微信群或Q群进行交流
获取最新文章: 扫一扫加入“创客智造”公众号
UBlox GPS
UBlox GPS Module
(This is a common page – Edit original only in APM Developer Wiki)
UPDATE THIS PAGE
Configuring a uBlox module

uBlox modules from the DIY Drones store are shipped with a custom configuration for compatibility with the Ardupilot Mega.
If for some reason you need to reprogram the custom configuration, you can follow these instructions: You will need an FTDI cable and a GPS adapter cable to connect the GPS to your computer. If you have never plugged an FTDI device into your computer, you may need to download and install the Virtual COM port driver.
Download and install uBlox’s u-center software. Note that this is Windows only.
Get the 3DR-Ublox.txt configuration file. You can download it direcly here, or if you have local clone of the Ardupilot-mega repository, the file is located in /libraries/AP_GPS/config/3DR-Ublox.txt. Run u-center and connect your uBlox to your computer.
Click the magic wand button to enable auto-bauding, then select your appropriate COM port by clicking the down arrow next to the Receiver Port button.
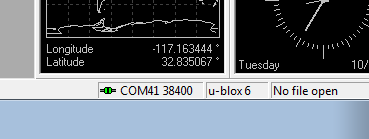
If the uBlox is connected to the port you selected, you should see the serial activity indicator blinking in the program’s status bar in the lower right-hand corner of the window, it also shows the current baud rate.

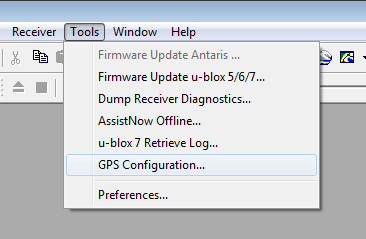
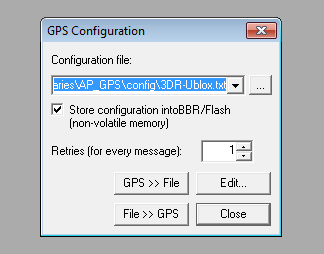
To load the configuration file, go to the Tools menu, then GPS Configuration. A small window should appear. Add the path to the 3DR-Ublox.txt configuration file, enable the
Store configuration into BBR/Flash (non-volatile memory) option, and click the File >> GPS button.
You may get a Configuration Version Check alert telling you there is a version mismatch between the configuration file and the You should see a window with a log of the cofiguration file upload, if the upload is successful the window should close automatically and the GPS module should now be connected to u-center at 38400 baud.
You can confirm this by checking the connection status in u-center’s status bar.GPS receiver. This is because the configuration file was written for the GPS software version 7.01, and you have a module with software version 7.03 or newer. Click yes to continue.
The uBlox module is now ready to be used with Ardupilot Mega.
纠错,疑问,交流: 请进入讨论区或 请点击进入页面,扫码加入微信群或Q群进行交流
获取最新文章: 扫一扫加入“创客智造”公众号