


Arduino库教程-Ethernet-Web Client
纠错,疑问,交流: 请进入讨论区或 请点击进入页面,扫码加入微信群或Q群进行交流
获取最新文章: 扫一扫加入“创客智造”公众号
Web Client(网页客户端)
- 这个例子说明了如何使用以太网shield来做一个HTTP请求。它返回一个谷歌搜索术语“Arduino”。这个搜索的结果通过Arduino的串口窗口,可作为HTML被看到。
硬件要求
- Arduino 或者 Genuino 开发板
- Arduino Ethernet Shield
电路
-
以太网shield可以让你通过SPI总线连接一个 Wiznet 以太网控制器到Arduino或者genuino开发板板。它使用SPI总线连接的引脚pin 10,11,12,和13,到Wiznet。以太网shield后来的模块也有一个SD卡在板上。数字引脚 pin 4 用来控制SD卡上的从选择引脚(slave select pin)。
-
shield应该连接到一个有以太网电缆的网络。您将需要更改程序中的网络设置来对应于您的网络。
图由 Fritzing 软件绘制
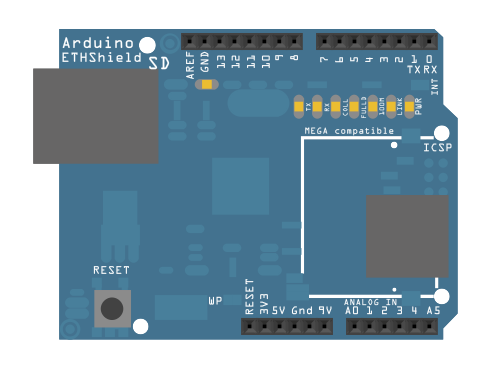 在上面的图片里,Arduino或genuino开发板会堆叠在以太网shield下面。
原理图

样例代码
/*
  Web client

 This sketch connects to a website (http://www.google.com)
 using an Arduino Wiznet Ethernet shield.

 Circuit:
 * Ethernet shield attached to pins 10, 11, 12, 13

 created 18 Dec 2009
 by David A. Mellis
 modified 9 Apr 2012
 by Tom Igoe, based on work by Adrian McEwen

 */

#include <SPI.h>
#include <Ethernet.h>

// Enter a MAC address for your controller below.
// Newer Ethernet shields have a MAC address printed on a sticker on the shield
byte mac[] = { 0xDE, 0xAD, 0xBE, 0xEF, 0xFE, 0xED };
// if you don't want to use DNS (and reduce your sketch size)
// use the numeric IP instead of the name for the server:
//IPAddress server(74,125,232,128);  // numeric IP for Google (no DNS)
char server[] = "www.google.com";    // name address for Google (using DNS)

// Set the static IP address to use if the DHCP fails to assign
IPAddress ip(192, 168, 0, 177);

// Initialize the Ethernet client library
// with the IP address and port of the server
// that you want to connect to (port 80 is default for HTTP):
EthernetClient client;

void setup() {
  // Open serial communications and wait for port to open:
  Serial.begin(9600);
  while (!Serial) {
    ; // wait for serial port to connect. Needed for native USB port only
  }

  // start the Ethernet connection:
  if (Ethernet.begin(mac) == 0) {
    Serial.println("Failed to configure Ethernet using DHCP");
    // try to congifure using IP address instead of DHCP:
    Ethernet.begin(mac, ip);
  }
  // give the Ethernet shield a second to initialize:
  delay(1000);
  Serial.println("connecting...");

  // if you get a connection, report back via serial:
  if (client.connect(server, 80)) {
    Serial.println("connected");
    // Make a HTTP request:
    client.println("GET /search?q=arduino HTTP/1.1");
    client.println("Host: www.google.com");
    client.println("Connection: close");
    client.println();
  } else {
    // if you didn't get a connection to the server:
    Serial.println("connection failed");
  }
}

void loop() {
  // if there are incoming bytes available
  // from the server, read them and print them:
  if (client.available()) {
    char c = client.read();
    Serial.print(c);
  }

  // if the server's disconnected, stop the client:
  if (!client.connected()) {
    Serial.println();
    Serial.println("disconnecting.");
    client.stop();

    // do nothing forevermore:
    while (true);
  }
}
[Get Code] 更多
- Arduino Ethernet Shield – 产品描述。
- Getting started with the Ethernet Shield – 在几分钟内启动所有东西。
- Ethernet library – 以太网库的参考手册
- AdvancedChatServer - 一个服务器,用来发送所有传入的信息到所有连接的客户端(除了那个发送信息的客户端)。
- ChatServer - 一个简单的服务器,用来发送所有传入的信息到所有连接的客户端。
- WebClient – 查询网络,并通过串口监视器得到答案
- WebClientRepeating - 如何用以太网shield重复HTTP请求。
- WebServer - 一个简单的Web服务器,用来显示模拟输入的值。
- DhcpAddressPrinter – 获取DHCP地址,并打印出到串口监视器。
- DhcpChatServer – 连接到一个telnet服务器,并打印所有收到的信息到串口监视器上。用DHCP。
- TelnetClient - 连接到一个telnet服务器,并打印所有收到的信息到串口监视器上。
- BarometricPressureWebServer – 用SPI从压力传感器读取的Post数据。
- UDPSendReceiveString - 通过UDP协议(通用数据包)发送和接收文本字符串。
- UdpNtpClient - 查询一个网络时间协议(NTP)服务器,并通过串口服务器监视器获取这个信息。
纠错,疑问,交流: 请进入讨论区或 请点击进入页面,扫码加入微信群或Q群进行交流
获取最新文章: 扫一扫加入“创客智造”公众号