


Arduino库教程-GSM-Gsm Web Client
纠错,疑问,交流: 请进入讨论区或 请点击进入页面,扫码加入微信群或Q群进行交流
获取最新文章: 扫一扫加入“创客智造”公众号
GSM Web Client
- 这个程序通过GSM shield连接一个Arduino或genuino开发板到Arduino主页,http://arduino.cc。然后通过Arduino软件(IDE)串口监视器打印页面的内容。
硬件要求
- Arduino or Genuino Board
- Arduino + Telefonica GSM/GPRS Shield
- 启用数据的SIM卡
电路
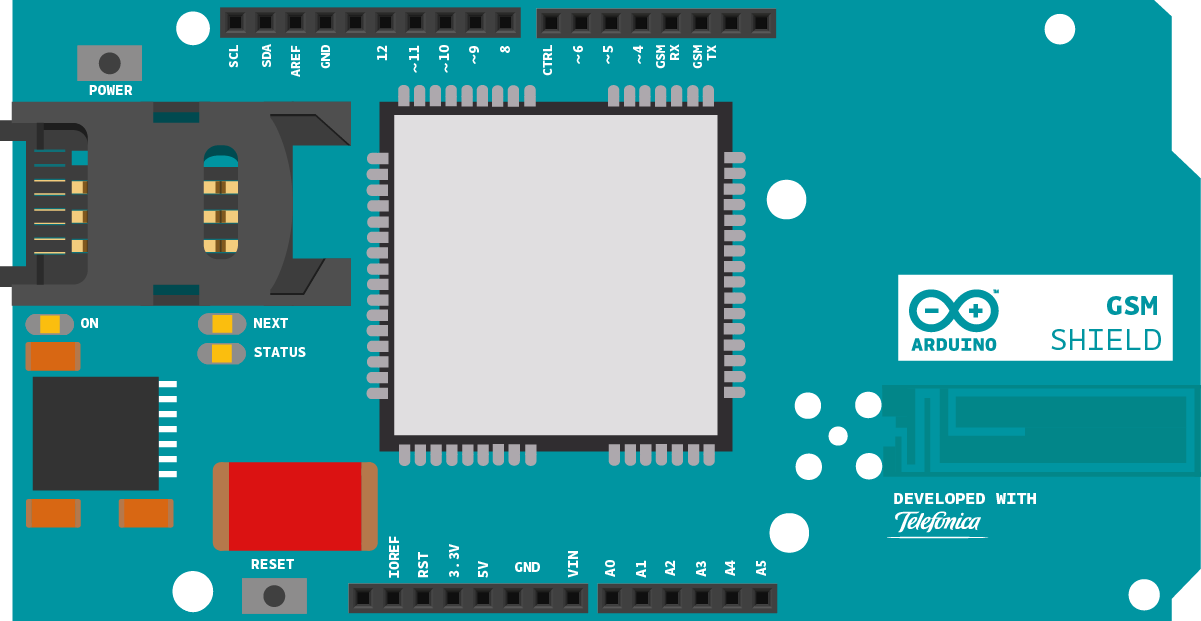 这是在一块Arduino或者Genuino开发板上的Arduino GSM Shield图
样例代码
- 首先,加上GSM库
#include <GSM.h>- SIM卡可能有一个引脚数,来使能它们的功能。为您的SIM卡定义引脚。如果你的卡没有引脚,你可以让它空白:
#define PINNUMBER ""- 定义几个常量来包含要连接的GPRS网络信息。你需要的接入点名称(APN)、登录和密码。要获得此信息,请与您的网络提供者联系,以获取最新的信息。此页有关于各种载波设置的一些信息,但它可能不是最新的。
#define GPRS_APN       "GPRS_APN"
#define GPRS_LOGIN     "login"
#define GPRS_PASSWORD "password"- 初始化要使用的类的实例。你需要GSM,GPRS,和gsmclient类。
GSMClient client;
GPRS gprs;
GSM gsmAccess;- 创建一些变量来保存服务器、路径和你希望连接到的端口。
char server[] = "arduino.cc";
char path[] = "/";
int port = 80;- 在setup()里,打开一个到计算机的串口连接。打开连接后,发送一个消息示意程序已经开始了。
void setup(){
  Serial.begin(9600);
Serial.println("Starting Arduino web client.");- 创建一个本地变量来跟踪连接状态。直到SIM连接到网络之前,你可以用这个来防止程序开始运行:
boolean notConnected = true;-
通过调用gsmAccess.begin()连接到网络。它以SIM卡的引脚当作一个参数。你也可以用gprs.attachGPRS()连接到GPRS网络。这个要求你前面声明的APN,登录和密码。通过放在while()循环里,你可以不断地检查连接的状态,等到他们都成为真。
-
当调制解调器连接到GPRS网络,gsmAccess() 将返回GSM_READY。以此为连接与否的标志。一旦连接好,setup()的其余部分将会运行。
while(notConnected)
  {
    if(gsmAccess.begin(PINNUMBER)==GSM_READY)
        (gprs.attachGPRS(GPRS_APN, GPRS_LOGIN, GPRS_PASSWORD)==GPRS_READY))
      notConnected = false;
    else
    {
      Serial.println("Not connected");
      delay(1000);
    }
}- 尝试用client.connect()连接到服务器。connect()需要两个参数,服务器和端口(server and port)。一旦连接到服务器,通过调用client.print()来进行HTTP请求。一个典型的Web请求看起来就像"GET pathname HTTP/1.0"。打印会发送消息,就像浏览器那样。
if (client.connect(server, port))
  {
    Serial.println("connected");
    client.print("GET ");
    client.print(path);
    client.println(" HTTP/1.0");
    client.println();
}- 如果连接到服务器失败,请在串口监视器中说明它,并关闭setup。
else
  {
    Serial.println("connection failed");
  }
}
[Get Code] 循环内部,检查是否有从服务器返回的字节。如果是的话,读取他们,并打印到串口监视器。
if (client.available())
  {
    char c = client.read();
    Serial.print(c);
}- 如果服务器断开连接(一旦完成了HTTP请求,它通常会这么做),停止本地客户端和关闭循环。
if (!client.available() && !client.connected())
  {
    Serial.println();
    Serial.println("disconnecting.");
    client.stop();

    // do nothing forevermore:
    for(;;)
      ;
  }
}-
一旦你的代码上传了,打开串行监视器。当收到时,你应该可以看到打印在屏幕上的 HTML:“http://arduino.cc”。它需要大约一分钟,所以如果你没有立即得到反馈,不要担心!
-
完整程序如下。
/*
  Web client

 This sketch connects to a website through a GSM shield. Specifically,
 this example downloads the URL "http://www.arduino.cc/asciilogo.txt" and
 prints it to the Serial monitor.

 Circuit:
 * GSM shield attached to an Arduino
 * SIM card with a data plan

 created 8 Mar 2012
 by Tom Igoe

 http://www.arduino.cc/en/Tutorial/GSMExamplesWebClient

 */

// libraries
#include <GSM.h>

// PIN Number
#define PINNUMBER ""

// APN data
#define GPRS_APN       "GPRS_APN" // replace your GPRS APN
#define GPRS_LOGIN     "login"    // replace with your GPRS login
#define GPRS_PASSWORD  "password" // replace with your GPRS password

// initialize the library instance
GSMClient client;
GPRS gprs;
GSM gsmAccess;

// URL, path & port (for example: arduino.cc)
char server[] = "arduino.cc";
char path[] = "/asciilogo.txt";
int port = 80; // port 80 is the default for HTTP

void setup() {
  // initialize serial communications and wait for port to open:
  Serial.begin(9600);
  while (!Serial) {
    ; // wait for serial port to connect. Needed for native USB port only
  }

  Serial.println("Starting Arduino web client.");
  // connection state
  boolean notConnected = true;

  // After starting the modem with GSM.begin()
  // attach the shield to the GPRS network with the APN, login and password
  while (notConnected) {
    if ((gsmAccess.begin(PINNUMBER) == GSM_READY) &
        (gprs.attachGPRS(GPRS_APN, GPRS_LOGIN, GPRS_PASSWORD) == GPRS_READY)) {
      notConnected = false;
    } else {
      Serial.println("Not connected");
      delay(1000);
    }
  }

  Serial.println("connecting...");

  // if you get a connection, report back via serial:
  if (client.connect(server, port)) {
    Serial.println("connected");
    // Make a HTTP request:
    client.print("GET ");
    client.print(path);
    client.println(" HTTP/1.1");
    client.print("Host: ");
    client.println(server);
    client.println("Connection: close");
    client.println();
  } else {
    // if you didn't get a connection to the server:
    Serial.println("connection failed");
  }
}

void loop() {
  // if there are incoming bytes available
  // from the server, read them and print them:
  if (client.available()) {
    char c = client.read();
    Serial.print(c);
  }

  // if the server's disconnected, stop the client:
  if (!client.available() && !client.connected()) {
    Serial.println();
    Serial.println("disconnecting.");
    client.stop();

    // do nothing forevermore:
    for (;;)
      ;
  }
}
[Get Code] 更多
-
GPRS Constructor
-
attachGPRS()
-
GSMClient Constructor
-
ready()
-
connect()
-
beginWrite()
-
write()
-
endWrite()
-
connected()
-
read()
-
available()
-
peek()
-
flush()
-
stop()
-
Arduino GSM Shield – 完整的产品描述。
-
Getting started with the GSM Shield – 在几分钟内启动所有东西
-
GSM library – GSM 库的参考网页
-
GSMExamplesMakeVoiceCall -如何用麦克风和扬声器进行语音通话。
-
GSMExamplesReceiveVoiceCall - 接收并连接该呼叫,呼叫的号码显示在串口监视器上,然后挂断电话。
-
GSMExamplesReceiveSMS - 如何收到一个SMS信息。
-
GSMExamplesSendSMS - 如何通过串口监视器发送SMS输入号码和文本。
-
GSMExamplesWebServer - 当从客户端获取一个请求时,Web服务器返回模拟输入引脚上的值。
-
GSMToolsTestGPRS – 试图用提供的APN和证书来通过GPRS访问互联网 。
纠错,疑问,交流: 请进入讨论区或 请点击进入页面,扫码加入微信群或Q群进行交流
获取最新文章: 扫一扫加入“创客智造”公众号