


Arduino库教程-Servo-Knob
纠错,疑问,交流: 请进入讨论区或 请点击进入页面,扫码加入微信群或Q群进行交流
获取最新文章: 扫一扫加入“创客智造”公众号
Knob
-
用你的Arduino的和电位器来控制一个RC(hobby)伺服电机的位置。
-
这个例子充分利用了Arduino伺服库。
硬件要求
- Arduino or Genuino Board
- 伺服电机
- 10k ohm 电位计
- 连接线
电路
-
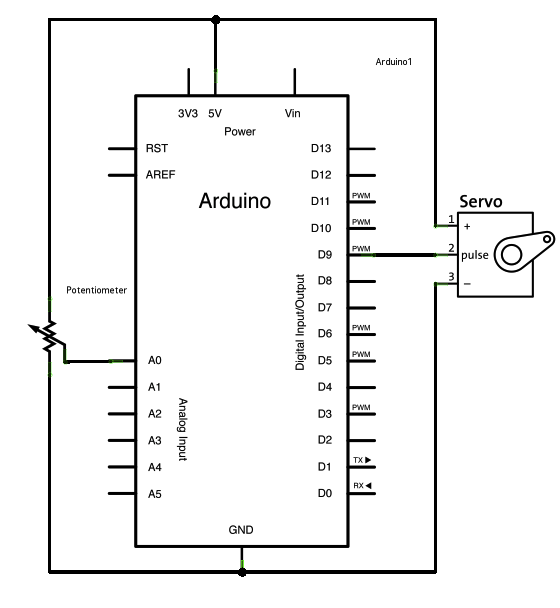
伺服电机有三根线:电源、接地和信号。电源线通常是红色的,应该连接到Arduino或genuino板的5V引脚上。接地线通常为黑色或棕色,应连接到板上的地引脚。该信号引脚通常是黄色或橙色,应连接到主板上的引脚pin 9。
-
电位器应该两个outer引脚连接到电源(+5)和地,其中间引脚连接到板上模拟输入A0。
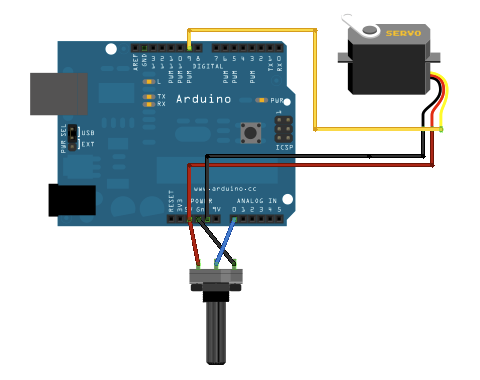 图由 Fritzing 软件绘制
原理图
样例代码
/*
 Controlling a servo position using a potentiometer (variable resistor)
 by Michal Rinott <http://people.interaction-ivrea.it/m.rinott>

 modified on 8 Nov 2013
 by Scott Fitzgerald
 http://www.arduino.cc/en/Tutorial/Knob
*/

#include <Servo.h>

Servo myservo;  // create servo object to control a servo

int potpin = 0;  // analog pin used to connect the potentiometer
int val;    // variable to read the value from the analog pin

void setup() {
  myservo.attach(9);  // attaches the servo on pin 9 to the servo object
}

void loop() {
  val = analogRead(potpin);            // reads the value of the potentiometer (value between 0 and 1023)
  val = map(val, 0, 1023, 0, 180);     // scale it to use it with the servo (value between 0 and 180)
  myservo.write(val);                  // sets the servo position according to the scaled value
  delay(15);                           // waits for the servo to get there
}
[Get Code] 更多
- attach()
- write()
- map()
- analogRead()
- Servo library reference
- Knob: 用电位器控制伺服的位置。
- Sweep: 扫描伺服电机前进后退的轴。
纠错,疑问,交流: 请进入讨论区或 请点击进入页面,扫码加入微信群或Q群进行交流
获取最新文章: 扫一扫加入“创客智造”公众号