


Arduino库教程-WIfi无线扩展块101-Simple Web Server WiFi
纠错,疑问,交流: 请进入讨论区或 请点击进入页面,扫码加入微信群或Q群进行交流
获取最新文章: 扫一扫加入“创客智造”公众号
Simple Web Server WiFi
-
在这个例子中,一个简单的Web服务器可以让你在网页上闪烁一个LED。这个例子将打印WiFi Shield 101 或者 MKR1000 开发板(一旦连上)的IP地址到Arduino软件(IDE)串口监视器。一旦你知道开发板的IP地址,你可以在一个Web浏览器里打开该地址来打开和关闭引脚9上的LED。
-
如果你的扩展块/板的IP地址是你的地址: http://yourAddress/H 打开LED http://yourAddress/L 关闭LED
-
这个例子是为一个使用WPA加密的网络编写的。对于WEP或WPA,相应地改变Wifi.begin()的调用。
硬件要求
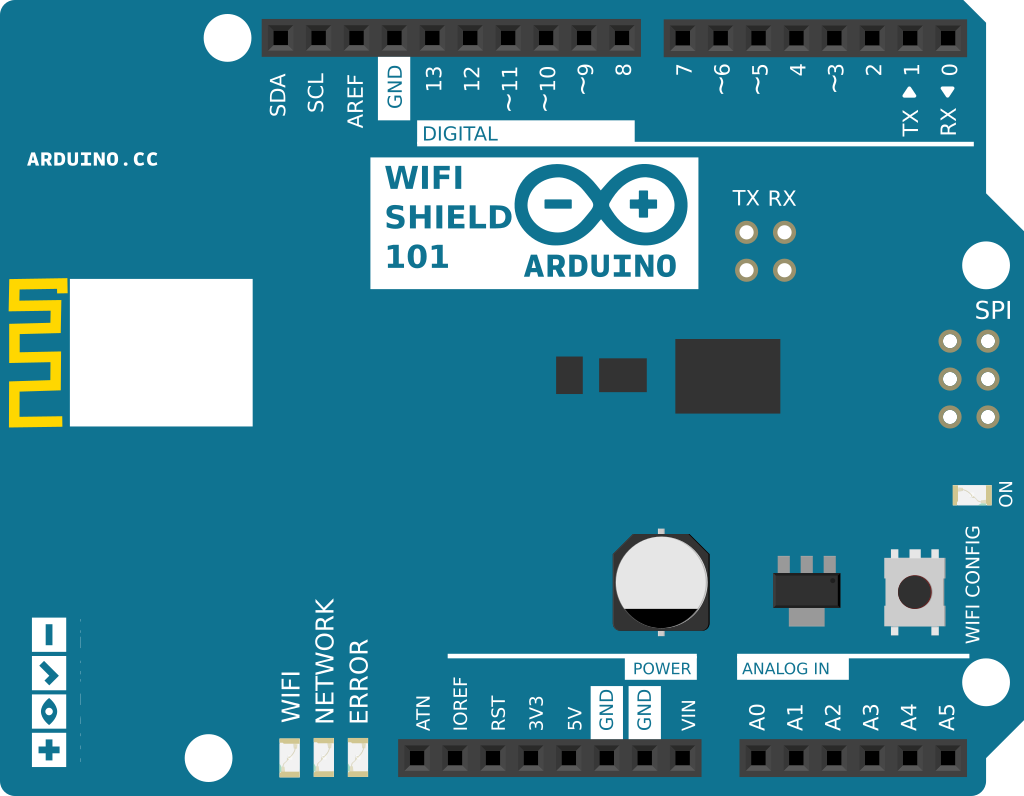
- Arduino WiFi Shield 101
- Arduino or Genuino Zero board 或者 MKR1000 (可选择)连接到模拟引脚pin 2-5的6个模拟传感器
电路
-
数字引脚7被用来作为WiFi Shield 101 和 开发板的握手引脚使用,而不应该被占用。
-
这个例子里你应该进入一个连接到互联网的802.11b/g无线网络。你需要改变程序里的网络设置来符合您的特定网络SSID。
-
对于使用WPA/WPA2个人加密的网络,你需要的SSID和密码。扩展块将无法通过WPA2企业加密连接到网络。
-
WEP网络密码进制字符串作为键。一个WEP网络可以有4种不同的钥匙;每个按键都分配了一个“关键指标”的价值。WEP加密的网络,你需要SSID,key,和key number。
 图由 Fritzing 绘制
在上图,Arduino 或 Genuino Zero 开发板应该在堆叠在 WiFi shield上面。
图由 Fritzing 绘制
在上图,Arduino 或 Genuino Zero 开发板应该在堆叠在 WiFi shield上面。
样例代码
- 这个程序通过WiFi建立与您的局域网连接,并获取一个本地可用的DHCP服务器的IP地址。地址是需要访问简单的Web服务器,因此它是打印在Arduino软件(IDE)串口监视器,如下:
Access Point Web Server
Creating access point named: MKR1000-network
SSID: MKR1000-network
IP Address: 192.168.1.1
signal strength (RSSI):-100 dBm
To see this page in action, open a browser to http://192.168.1.1- 每个连接都同样在串行监视器上报告,并且每个连接包含与连接客户端相关的信息。在下面的示例中,客户端是在OSX的浏览器:
new client
GET / HTTP/1.1
Host: 192.168.1.1
Connection: keep-alive
Accept: text/html,application/xhtml+xml,application/xml;q=0.9,image/webp,*/*;q=0.8
Upgrade-Insecure-Requests: 1
User-Agent: Mozilla/5.0 (Macintosh; Intel Mac OS X 10_10_5) AppleWebKit/537.36 (KHTML, like Gecko) Chrome/49.0.2623.87 Safari/537.36
Accept-Encoding: gzip, deflate, sdch
Accept-Language: it-IT,it;q=0.8,en-US;q=0.6,en;q=0.4,ja;q=0.2

client disconnected
new client
GET /favicon.ico HTTP/1.1
Host: 192.168.1.1
Connection: keep-alive
User-Agent: Mozilla/5.0 (Macintosh; Intel Mac OS X 10_10_5) AppleWebKit/537.36 (KHTML, like Gecko) Chrome/49.0.2623.87 Safari/537.36
Accept: */*
Referer: http://192.168.1.1/
Accept-Encoding: gzip, deflate, sdch
Accept-Language: it-IT,it;q=0.8,en-US;q=0.6,en;q=0.4,ja;q=0.2

client disconnected- 完整程序如下:
/*
  WiFi Web Server LED Blink

 A simple web server that lets you blink an LED via the web.
 This sketch will print the IP address of your WiFi Shield (once connected)
 to the Serial monitor. From there, you can open that address in a web browser
 to turn on and off the LED on pin 9.

 If the IP address of your shield is yourAddress:
 http://yourAddress/H turns the LED on
 http://yourAddress/L turns it off

 This example is written for a network using WPA encryption. For
 WEP or WPA, change the Wifi.begin() call accordingly.

 Circuit:
 * WiFi shield attached
 * LED attached to pin 9

 created 25 Nov 2012
 by Tom Igoe
 */
#include <SPI.h>
#include <WiFi101.h>

char ssid[] = "yourNetwork";      //  your network SSID (name)
char pass[] = "secretPassword";   // your network password
int keyIndex = 0;                 // your network key Index number (needed only for WEP)

int status = WL_IDLE_STATUS;
WiFiServer server(80);

void setup() {
  Serial.begin(9600);      // initialize serial communication
  pinMode(9, OUTPUT);      // set the LED pin mode

  // check for the presence of the shield:
  if (WiFi.status() == WL_NO_SHIELD) {
    Serial.println("WiFi shield not present");
    while (true);       // don't continue
  }

  // attempt to connect to Wifi network:
  while ( status != WL_CONNECTED) {
    Serial.print("Attempting to connect to Network named: ");
    Serial.println(ssid);                   // print the network name (SSID);

    // Connect to WPA/WPA2 network. Change this line if using open or WEP network:
    status = WiFi.begin(ssid, pass);
    // wait 10 seconds for connection:
    delay(10000);
  }
  server.begin();                           // start the web server on port 80
  printWifiStatus();                        // you're connected now, so print out the status
}


void loop() {
  WiFiClient client = server.available();   // listen for incoming clients

  if (client) {                             // if you get a client,
    Serial.println("new client");           // print a message out the serial port
    String currentLine = "";                // make a String to hold incoming data from the client
    while (client.connected()) {            // loop while the client's connected
      if (client.available()) {             // if there's bytes to read from the client,
        char c = client.read();             // read a byte, then
        Serial.write(c);                    // print it out the serial monitor
        if (c == '\n') {                    // if the byte is a newline character

          // if the current line is blank, you got two newline characters in a row.
          // that's the end of the client HTTP request, so send a response:
          if (currentLine.length() == 0) {
            // HTTP headers always start with a response code (e.g. HTTP/1.1 200 OK)
            // and a content-type so the client knows what's coming, then a blank line:
            client.println("HTTP/1.1 200 OK");
            client.println("Content-type:text/html");
            client.println();

            // the content of the HTTP response follows the header:
            client.print("Click <a href=\"/H\">here</a> turn the LED on pin 9 on<br>");
            client.print("Click <a href=\"/L\">here</a> turn the LED on pin 9 off<br>");

            // The HTTP response ends with another blank line:
            client.println();
            // break out of the while loop:
            break;
          }
          else {      // if you got a newline, then clear currentLine:
            currentLine = "";
          }
        }
        else if (c != '\r') {    // if you got anything else but a carriage return character,
          currentLine += c;      // add it to the end of the currentLine
        }

        // Check to see if the client request was "GET /H" or "GET /L":
        if (currentLine.endsWith("GET /H")) {
          digitalWrite(9, HIGH);               // GET /H turns the LED on
        }
        if (currentLine.endsWith("GET /L")) {
          digitalWrite(9, LOW);                // GET /L turns the LED off
        }
      }
    }
    // close the connection:
    client.stop();
    Serial.println("client disonnected");
  }
}

void printWifiStatus() {
  // print the SSID of the network you're attached to:
  Serial.print("SSID: ");
  Serial.println(WiFi.SSID());

  // print your WiFi shield's IP address:
  IPAddress ip = WiFi.localIP();
  Serial.print("IP Address: ");
  Serial.println(ip);

  // print the received signal strength:
  long rssi = WiFi.RSSI();
  Serial.print("signal strength (RSSI):");
  Serial.print(rssi);
  Serial.println(" dBm");
  // print where to go in a browser:
  Serial.print("To see this page in action, open a browser to http://");
  Serial.println(ip);
}
[Get Code] 更多
-
WiFi library – WiFi101 库的参考网页
-
WiFi Shield – WiFi 扩展板 101 的产品细节
-
MKR1000 – MKR1000 板的产品细节
-
Connect No Encryption: 演示如何连接到一个开放的网络。
-
Connect With WEP: 演示如何连接到用WEP加密的网络。
-
Connect With WPA: 演示如何连接到一个用WPA2个人加密网络。
-
Scan Networks:显示出所有在范围内的无线网络。
-
Simple Web Server WiFi: 通过打开和关闭一个LED来访问这个简单的Web服务器
-
UDP NTP Client: 通过UDP查询网络时间协议(NTP)服务器。
-
WiFi Chat Server: 建立一个简单的聊天服务器。
-
WiFi Web Client: 连接到一个远程服务器。
-
WiFi Web Client Repeating: 反复做HTTP请求到服务器。
-
WiFi Web Server: 通过模拟输入值来服务一个来自WIfi无线扩展块的网页。
-
WiFi Send Receive UDP String: 发送和接收UDP字符串。
纠错,疑问,交流: 请进入讨论区或 请点击进入页面,扫码加入微信群或Q群进行交流
获取最新文章: 扫一扫加入“创客智造”公众号