


Arduino库教程-GSM-Test GPRS
纠错,疑问,交流: 请进入讨论区或 请点击进入页面,扫码加入微信群或Q群进行交流
获取最新文章: 扫一扫加入“创客智造”公众号
GSM Test GPRS
-
这个程序测试在GSM shield上的GPRS数据连接。它试图连接到arduino.cc。
-
使用一个和GSM shield的数据连接,你会需要你的服务提供者的接入点名称(APN)、登录和密码。要获得此信息,联系网络提供者,以获得最新的信息。此页有一些关于各种载波设置的信息,但它可能不是最新的。
硬件要求
- Arduino or Genuino Board
- Arduino + Telefonica GSM/GPRS Shield
- SIM card enable for Data
电路
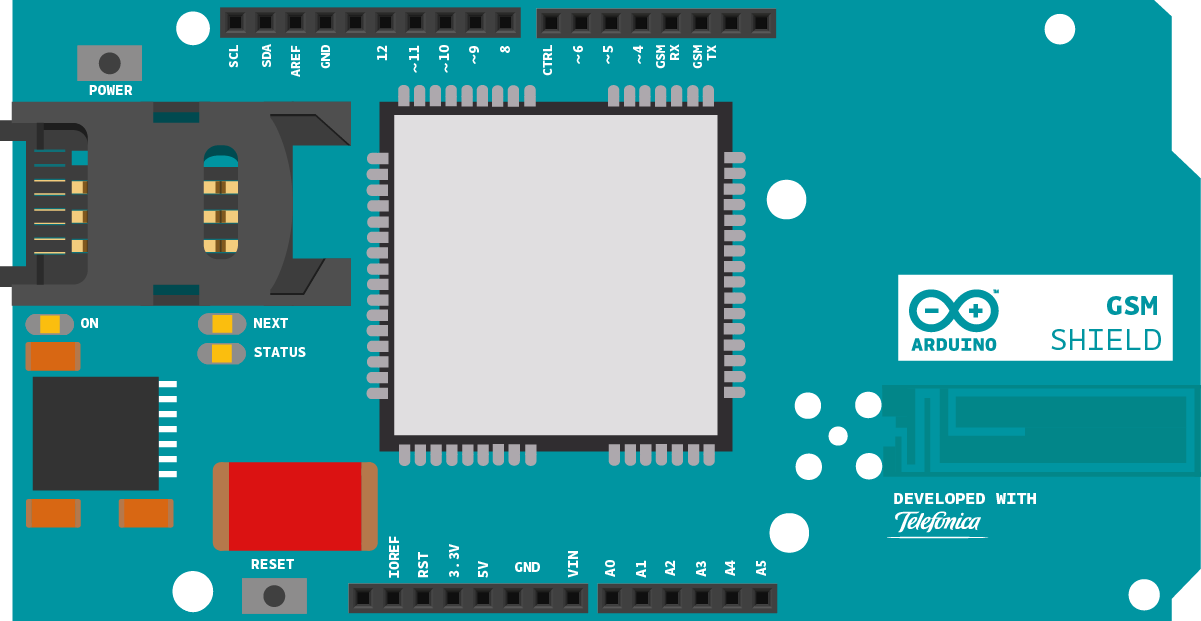 这是在一块Arduino或者Genuino开发板上的Arduino GSM Shield图
样例代码
- 首先,加上GSM库
#include <GSM.h>- SIM卡可能有一个引脚数,来使能它们的功能。为您的SIM卡定义引脚。如果你的卡没有引脚,你可以让它空白:
#define PINNUMBER ""- 初始化将要使用的类的实例。你同时需要GSM和GSMVoiceCall类。
GSMClient client;
GPRS gprsAccess;
GSM gsmAccess;- 创建一些状态消息发送到串口监视器:
String oktext = "OK";
String errortext = "ERROR";- 创建一些变量来保持服务器、路径和您希望连接到的代理服务器。
char url[] = "arduino.cc";
char path[] = "/";
char urlproxy[] = "http://arduino.cc";- 创建一个变量来保存来自服务器的反馈,并用一个标志来表示您是否将使用一个代理服务器。
String response = "";

boolean use_proxy = false;- 在 setup 里, 打开一个到计算机的串口连接。
void setup(){
  Serial.begin(9600);
}- 您将创建一个自定义函数来处理来自串口监视器的串行输入。制作一个命名好的函数,来接收一个字符数组作为一个参数。
int readSerial(char result[])
{- 使一个变量作为一个计数器使用。当有可用的串口信息时,将其读到字符数组中。如果遇到一个换行符,终止数组并返回主程序。
int i = 0;
  while(1)
  {
    while (Serial.available() > 0)
    {
      char inChar = Serial.read();
      if (inChar == '\n')
      {
        result[i] = '\0';
        return 0;
      }
      if(inChar!='\r')
      {
        result[i] = inChar;
        i++;
      }
    }
  }
}- 在loop()里, 把代理的标志设置为false
void loop()
{
use_proxy = false;- 通过输入PIN号码(如果合适)到gsmAccess.begin(),来开始GSM网络的连接。
Serial.print("Connecting GSM network...");
  if(gsmAccess.begin(PINNUMBER)!=GSM_READY)
  {
    Serial.println(errortext);
    while(true);
  }
  Serial.println(oktext);
[Get Code]
- 创建一个数组来保存APN。用你创建的readSerial()函数来从串口监视器得到字节。
char apn[50];
  Serial.print("Enter your APN: ");
  readSerial(apn);
Serial.println(apn);- 创建一个字符数组来保存APN登录。用你创建的readSerial()函数来从串口监视器得到字节。
char login[50];
  Serial.print("Now, enter your login: ");
  readSerial(login);
Serial.println(login);- 创建一个字符数组保存APN密码。用你创建的readSerial()函数来从串口监视器得到字节。
char password[20];
  Serial.print("Finally, enter your password: ");
readSerial(password);-
通过 gprs.attachGPRS()连接到GPRS网络。这个要求你要进入的APN、登录和密码。
-
当调制解调器连接到GPRS网络,gsmAccess()将返回GSM_READY。
Serial.println("Attaching to GPRS with your APN...");
  if(gprsAccess.attachGPRS(apn, login, password)!=GPRS_READY)
  {
    Serial.println(errortext);
  }
  else{

Serial.println(oktext);- 创建一个字符数组来保存您可能需要的代理信息。使用readserial()函数来从串口监测器得到的字节。
char proxy[100];
    Serial.print("If your carrier uses a proxy, enter it, if not press enter: ");
    readSerial(proxy);
Serial.println(proxy);- 如果用了代理,询问端口号,并将代理标志设置为true
int pport;
    if(proxy[0] != '\0'){
      // read proxy port introduced by user
      char proxyport[10];
      Serial.print("Enter the proxy port: ");
      readSerial(proxyport);
      // cast proxy port introduced to integer
      pport = (int) proxyport;
      use_proxy = true;
      Serial.println(proxyport);
}- 创建一个变量,以指示是否连接到服务器上。通过client.connect()连接到服务器。你如何连接将取决于是否使用代理。
Serial.print("Connecting and sending GET request to arduino.cc...");
    int res_connect;

    if(use_proxy)
      res_connect = client.connect(proxy, pport);
    else
res_connect = client.connect(url, 80);- 如果你已经连接,用client.print()来制作一个HTTP GET请求。
if (res_connect)
    {
      client.print("GET ");

      if(use_proxy)
        client.print(urlproxy);
      else
        client.print(path);

      client.println(" HTTP/1.0");
      client.println();
      Serial.println(oktext);
}- 如果没有连接上,打印一个 error
else
    {
      // if you didn't get a connection to the server
      Serial.println(errortext);
}- 通过client.available()查看是否服务器返回的任何字节。如果有,将它们读到响应字符串中,然后将它们转换成一个字符数组。检查含有子串“200 OK”的阵列,这表明是从arduino.cc发来的有效响应。
Serial.print("Receiving response...");

    boolean test = true;
    while(test)
    {
      if (client.available())
      {
        char c = client.read();
        response += c;

        char responsechar[response.length()+1];
        response.toCharArray(responsechar, response.length()+1);

        if(strstr(responsechar, "200 OK") != NULL){
          Serial.println(oktext);
          Serial.println("TEST COMPLETE!");
          test = false;
        }
}- 如果服务器已断开,停止客户端并关闭loop()
if (!client.connected())
      {
        Serial.println();
        Serial.println("disconnecting.");
        client.stop();
        test = false;
      }
    }
  }
}-
一旦你的代码被上传,打开串口监视器来查看连接的状态。
-
完整程序如下。
/*

 This sketch test the GSM shield's ability to connect to a
 GPERS network. It asks for APN information through the
 serial monitor and tries to connect to arduino.cc.

 Circuit:
 * GSM shield attached
 * SIM card with data plan

 Created 18 Jun 2012
 by David del Peral

 This example code is part of the public domain

 http://www.arduino.cc/en/Tutorial/GSMToolsTestGPRS

 */

// libraries
#include <GSM.h>

// PIN Number
#define PINNUMBER ""

// initialize the library instance
GSM gsmAccess;        // GSM access: include a 'true' parameter for debug enabled
GPRS gprsAccess;  // GPRS access
GSMClient client;  // Client service for TCP connection

// messages for serial monitor response
String oktext = "OK";
String errortext = "ERROR";

// URL and path (for example: arduino.cc)
char url[] = "arduino.cc";
char urlproxy[] = "http://www.arduino.cc";
char path[] = "/";

// variable for save response obtained
String response = "";

// use a proxy
boolean use_proxy = false;

void setup() {
  // initialize serial communications and wait for port to open:
  Serial.begin(9600);
  while (!Serial) {
    ; // wait for serial port to connect. Needed for Leonardo only
  }
}

void loop() {
  use_proxy = false;

  // start GSM shield
  // if your SIM has PIN, pass it as a parameter of begin() in quotes
  Serial.print("Connecting GSM network...");
  if (gsmAccess.begin(PINNUMBER) != GSM_READY) {
    Serial.println(errortext);
    while (true);
  }
  Serial.println(oktext);

  // read APN introduced by user
  char apn[50];
  Serial.print("Enter your APN: ");
  readSerial(apn);
  Serial.println(apn);

  // Read APN login introduced by user
  char login[50];
  Serial.print("Now, enter your login: ");
  readSerial(login);
  Serial.println(login);

  // read APN password introduced by user
  char password[20];
  Serial.print("Finally, enter your password: ");
  readSerial(password);

  // attach GPRS
  Serial.println("Attaching to GPRS with your APN...");
  if (gprsAccess.attachGPRS(apn, login, password) != GPRS_READY) {
    Serial.println(errortext);
  } else {

    Serial.println(oktext);

    // read proxy introduced by user
    char proxy[100];
    Serial.print("If your carrier uses a proxy, enter it, if not press enter: ");
    readSerial(proxy);
    Serial.println(proxy);

    // if user introduced a proxy, asks him for proxy port
    int pport;
    if (proxy[0] != '\0') {
      // read proxy port introduced by user
      char proxyport[10];
      Serial.print("Enter the proxy port: ");
      readSerial(proxyport);
      // cast proxy port introduced to integer
      pport = (int) proxyport;
      use_proxy = true;
      Serial.println(proxyport);
    }

    // connection with arduino.cc and realize HTTP request
    Serial.print("Connecting and sending GET request to arduino.cc...");
    int res_connect;

    // if use a proxy, connect with it
    if (use_proxy) {
      res_connect = client.connect(proxy, pport);
    } else {
      res_connect = client.connect(url, 80);
    }

    if (res_connect) {
      // make a HTTP 1.0 GET request (client sends the request)
      client.print("GET ");

      // if use a proxy, the path is arduino.cc URL
      if (use_proxy) {
        client.print(urlproxy);
      } else {
        client.print(path);
      }

      client.println(" HTTP/1.0");
      client.println();
      Serial.println(oktext);
    } else {
      // if you didn't get a connection to the server
      Serial.println(errortext);
    }
    Serial.print("Receiving response...");

    boolean test = true;
    while (test) {
      // if there are incoming bytes available
      // from the server, read and check them
      if (client.available()) {
        char c = client.read();
        response += c;

        // cast response obtained from string to char array
        char responsechar[response.length() + 1];
        response.toCharArray(responsechar, response.length() + 1);

        // if response includes a "200 OK" substring
        if (strstr(responsechar, "200 OK") != NULL) {
          Serial.println(oktext);
          Serial.println("TEST COMPLETE!");
          test = false;
        }
      }

      // if the server's disconnected, stop the client:
      if (!client.connected()) {
        Serial.println();
        Serial.println("disconnecting.");
        client.stop();
        test = false;
      }
    }
  }
}

/*
  Read input serial
 */
int readSerial(char result[]) {
  int i = 0;
  while (1) {
    while (Serial.available() > 0) {
      char inChar = Serial.read();
      if (inChar == '\n') {
        result[i] = '\0';
        return 0;
      }
      if (inChar != '\r') {
        result[i] = inChar;
        i++;
      }
    }
  }
}
[Get Code] 更多
-
Arduino GSM Shield – 完整的产品描述。
-
Getting started with the GSM Shield – 在几分钟内启动所有东西
-
GSM library – GSM 库的参考网页
-
GPRS Constructor
-
GSMClient Constructor
-
attachGPRS()
-
GSMToolsTestGPRS - 试图用提供的APN和证书来通过GPRS访问互联网 。
-
GSMToolsGsmScanNetworks - 扫描可用网络和打印关于IMEI和SIM卡号码的信息。
-
GSMToolsPinManagement - 如何更改或删除引脚数。
-
GSMToolsTestModem - 测试看看GSM shield的调制解调器是否正确工作。
-
GSMToolsTestWebServer - 一个简单的Web服务器,没有任何答复,只打印客户端的请求和服务器IP地址。
-
GSMExamplesMakeVoiceCall - 如何用麦克风和扬声器进行语音通话。
纠错,疑问,交流: 请进入讨论区或 请点击进入页面,扫码加入微信群或Q群进行交流
获取最新文章: 扫一扫加入“创客智造”公众号