


PX4与仿真入门教程-dronedoc-使用 Octomap 创建 3D 地图
纠错,疑问,交流: 请进入讨论区或 请点击进入页面,扫码加入微信群或Q群进行交流
获取最新文章: 扫一扫加入“创客智造”公众号
PX4与仿真入门教程-dronedoc-使用 Octomap 创建 3D 地图
说明:
- 介绍使用带有 RGBD 相机和 octomap 包的无人机来创建 3D 地图。
创建模型:
- 带有 RGBD 相机的 Iris SDF 文件是model.sdf
- 内容如下:
<?xml version='1.0'?>
<sdf version='1.6'>
  <model name='iris_depth_camera'>

    <include>
      <uri>model://iris</uri>
    </include>

    <!-- Depth camera -->
    <link name="camera_link">
      <pose>0.1 0 0 0 0 0</pose>
      <inertial>
        <mass>0.01</mass>
        <pose>0 0 0 0 -0 0</pose>
        <inertia>
          <ixx>1.8e-7</ixx>
          <ixy>0</ixy>
          <ixz>0</ixz>
          <iyy>2.1733e-6</iyy>
          <iyz>0</iyz>
          <izz>1.8e-7</izz>
        </inertia>
      </inertial>
      <collision name="collision">
        <geometry>
          <box>
            <size>0.03 0.08 0.03</size>
          </box>
        </geometry>
      </collision>
      <visual name="camera_visual">
        <geometry>
          <box>
            <size>0.03 0.08 0.03</size>
          </box>
        </geometry>
        <material>
          <script>
            <name>Gazebo/DarkGrey</name>
            <uri>file://media/materials/scripts/gazebo.material</uri>
          </script>
        </material>
      </visual>

      <sensor name="camera" type="depth">
        <update_rate>20</update_rate>
        <camera>
          <horizontal_fov>1.047198</horizontal_fov>
          <image>
            <width>640</width>
            <height>320</height>
            <format>R8G8B8</format>
          </image>
          <clip>
            <near>0.4</near>
            <far>3.5</far>
          </clip>
        </camera>
        <plugin name="camera_plugin" filename="libgazebo_ros_openni_kinect.so">
          <baseline>0.2</baseline>
          <alwaysOn>true</alwaysOn>
          <!-- Keep this zero, update_rate in the parent <sensor> tag
            will control the frame rate. -->
          <updateRate>0.0</updateRate>
          <cameraName>camera_ir</cameraName>
          <imageTopicName>/camera/depth/image_raw</imageTopicName>
          <cameraInfoTopicName>/camera/depth/camera_info</cameraInfoTopicName>
          <depthImageTopicName>/camera/depth/image_raw</depthImageTopicName>
          <depthImageInfoTopicName>/camera/depth/camera_info</depthImageInfoTopicName>
          <pointCloudTopicName>/camera/depth/points</pointCloudTopicName>
          <frameName>camera_link</frameName>
          <pointCloudCutoff>0.5</pointCloudCutoff>
          <pointCloudCutoffMax>3.0</pointCloudCutoffMax>
          <distortionK1>0</distortionK1>
          <distortionK2>0</distortionK2>
          <distortionK3>0</distortionK3>
          <distortionT1>0</distortionT1>
          <distortionT2>0</distortionT2>
          <CxPrime>0</CxPrime>
          <Cx>0</Cx>
          <Cy>0</Cy>
          <focalLength>0</focalLength>
          <hackBaseline>0</hackBaseline>
        </plugin>
      </sensor>
    </link>

    <joint name="camera_joint" type="fixed">
      <child>camera_link</child>
      <parent>iris::base_link</parent>
    </joint>

  </model>
</sdf>- 下面是RGBD相机传感器部分的定义。
- 对于ROS插件,我参考了ROS中的Gazebo plugins,对于
标签中的描述,我参考了gazebo_models/kinect/model.sdf。
<sensor name="camera" type="depth">
    <update_rate>20</update_rate>
    <camera>
      <horizontal_fov>1.047198</horizontal_fov>
      <image>
        <width>640</width>
        <height>320</height>
        <format>R8G8B8</format>
      </image>
      <clip>
        <near>0.4</near>
        <far>3.5</far>
      </clip>
    </camera>
    <plugin name="camera_plugin" filename="libgazebo_ros_openni_kinect.so">
      <baseline>0.2</baseline>
      <alwaysOn>true</alwaysOn>
      <!-- Keep this zero, update_rate in the parent <sensor> tag
        will control the frame rate. -->
      <updateRate>0.0</updateRate>
      <cameraName>camera_ir</cameraName>
      <imageTopicName>/camera/depth/image_raw</imageTopicName>
      <cameraInfoTopicName>/camera/depth/camera_info</cameraInfoTopicName>
      <depthImageTopicName>/camera/depth/image_raw</depthImageTopicName>
      <depthImageInfoTopicName>/camera/depth/camera_info</depthImageInfoTopicName>
      <pointCloudTopicName>/camera/depth/points</pointCloudTopicName>
      <frameName>camera_link</frameName>
      <pointCloudCutoff>0.05</pointCloudCutoff>
      <distortionK1>0</distortionK1>
      <distortionK2>0</distortionK2>
      <distortionK3>0</distortionK3>
      <distortionT1>0</distortionT1>
      <distortionT2>0</distortionT2>
      <CxPrime>0</CxPrime>
      <Cx>0</Cx>
      <Cy>0</Cy>
      <focalLength>0</focalLength>
      <hackBaseline>0</hackBaseline>
    </plugin>
</sensor>- 为了检查 RGBD 摄像头是否正常工作,创建一个 Launch 文件,该文件描述了从机器人的基础框架向 RGBD 摄像头广播 TF 的设置,mymodel_sitl_depth_camera.launch如下所示。
<launch>

    <node pkg="tf" name="base2depth" type="static_transform_publisher" args="0.1 0 0 -1.57 0 -1.57 base_link camera_link 100"/>

    <arg name="vehicle" default="iris_2d_lidar"/>
    <arg name="world" default="$(find mavlink_sitl_gazebo)/worlds/empty.world" />
    <arg name="sdf" default="$(find px4_sim_pkg)/models/iris_depth_camera/model.sdf" />
    <arg name="verbose" default="false"/>
    <arg name="debug" default="false"/>

    <include file="$(find px4)/launch/mavros_posix_sitl.launch" >
        <arg name="sdf" value="$(arg sdf)" />
        <arg name="vehicle" value="$(arg vehicle)" />
        <arg name="verbose" value="$(arg verbose)" />
        <arg name="debug" value="$(arg debug)" />
        <arg name="world" value="$(arg world)" />
    </include>

    <param name="/mavros/local_position/tf/send" type="bool" value="true" />
    <param name="/mavros/local_position/frame_id" type="str" value="map" />
    <param name="/mavros/local_position/tf/frame_id" type="str" value="map" />
    <param name="/mavros/setpoint_velocity/mav_frame"  type="str" value="BODY_NED" />
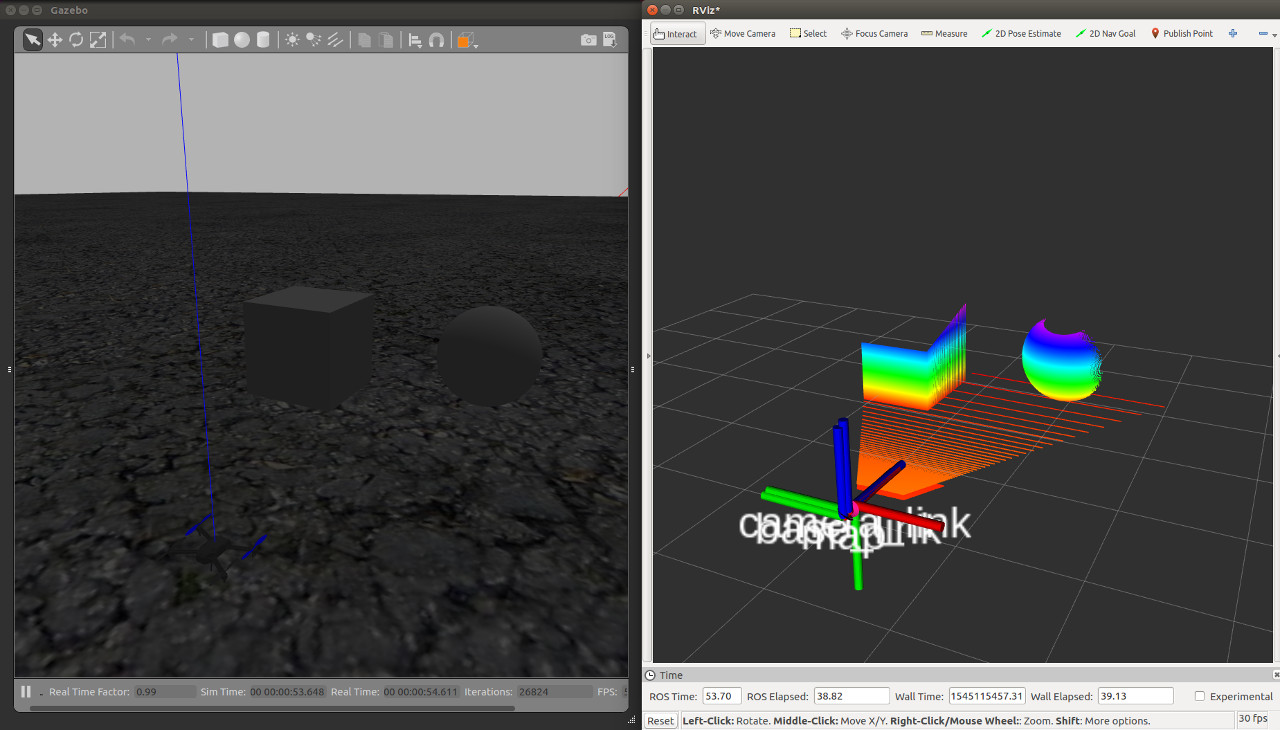
</launch>- 显示如下点云就OK了
准备Octomap
- 安装
sudo apt install ros-melodic-octomap-mapping- 创建一个Launch文件来执行octomap_server_node,它是一个通过Octomap生成3D地图的节点。
- 由于我们将根据 octomap_server 包中的 octomap_mapping.launch 文件进行更改,因此使用以下命令复制该文件。
roscp octomap_server octomap_mapping.launch ~/dronedoc_ws/src/px4_sim_pkg/launch/map/- 在这个设置中,全局框架是一张地图,点云发布到/camera/depth/points,所以这部分已经改变了。
- 编辑好的Launch文件octomap_mapping.launch如下。
<launch>
    <node pkg="octomap_server" type="octomap_server_node" name="octomap_server">
        <param name="resolution" value="0.05" />

        <!-- fixed map frame (set to 'map' if SLAM or localization running!) -->
	    <param name="frame_id" type="string" value="map" />

        <!-- maximum range to integrate (speedup!) -->
        <param name="sensor_model/max_range" value="5.0" />

        <!-- data source to integrate (PointCloud2) -->
        <remap from="cloud_in" to="/camera/depth/points" />

    </node>
</launch>- 目录位于px4_sim_pkg/launch/map/
测试:
- 启动模拟环境。
- 这次我们将使用 willow_garage.world 作为世界文件。
cd ~/tools/dronedoc/
source load_environment.sh
roslaunch px4_sim_pkg mymodel_sitl_depth_cam.launch world:=$HOME/dronedoc_ws/src/px4_sim_pkg/worlds/willow_garage.world- 然后启动octomap_server_node节点。
cd ~/tools/dronedoc/
source load_environment.sh
roslaunch px4_sim_pkg octomap_mapping.launch- 启动 Rviz 以查看创建的地图。
rviz
- 最后,启动 mavteleop 节点, 利用手柄控制。
cd ~/tools/dronedoc/
source load_environment.sh
roslaunch px4_sim_pkg mavros_teleop.launch- 在启动模拟环境的终端,执行起飞命令
commander takeoff- 将飞行模式更改为 OFFBOARD,以便可以从游戏手柄操作。
rosrun mavros mavsys mode -c OFFBOARD- 当您移动无人机时,将创建如下所示的 3D 地图。
- 在此视频中,更改分辨率参数以更改地图的分辨率。

纠错,疑问,交流: 请进入讨论区或 请点击进入页面,扫码加入微信群或Q群进行交流
获取最新文章: 扫一扫加入“创客智造”公众号